Showing posts with label Felt. Show all posts

Sunday, February 5, 2012

Conversation Heart Pillows

Cute, right!?  I love them. Go here to make your own. 

Thursday, January 12, 2012

Sewing for little people


I decided that since I'm at the sewing machine so often, and the boys are always so curious, I would let them have a go.  Well, as can be expected, they are in love.  Now Conley thinks he can make anything he wants!  Tents, toys, monsters, etc.  The first sewing endeavor I let them undertake was the little snowmen that are pictured at the top.  They each took turns sitting on my lap working the machine.  I let them do everything except for use the pedal.  I taught them how to control the fabric, place the needle in the down position, lift the foot, lower the foot, sew in the reverse, you get the idea.  The second project we made were "monsters".  Conley told me what he wanted them to look like, so we went from there.  He wanted triangle monsters with legs.  Both projects are filled with beans that I have sitting in my pantry (does that count as food storage rotation?) and there are no measurements,  I just cut out some shapes from some felt and made it work.  The faces are glued on.  I had to keep it super simple for the boys.  They love throwing and kicking these things around.

Tuesday, December 27, 2011

Nativity Finger Puppets

I made a set of these for each of my and my husbands siblings inlcuding our immediate family and his mother.  That's eight total.  Yeah, it was work, but so worth it!  A few years back, my grandmother sent our family a tiny little bag with 5 finger puppets.  It included Mary, Joseph, Baby Jesus, a cow, and an angel; this is where my inspiration came from.  I wanted to make something kids could enjoy, so I got to searching for a kid friendly book about the nativity.  I found one that looked promising (pictured a few pictures below) and I ordered them.  I waited till they arrived so that I could make the characters match those in the book.  They seriously turned out better then I had hoped.  And what was even more exciting for me was the fact that for the first time in my life, I made my very own patterns!  I kept the measurements of the bag I made, outlines of the puppets and everything so I can make them again and again.  I'm up in the air about sharing the pattern (not that I could right now anyway because I don't know how to upload it) because I'm very strongly considering starting up an account on Etsy and selling them.  Obviously the book would be sold seperately, but still, I think it has potential.  check them out:

The Wise Men
The animals
 The shephards
 Mary, Joseph and Baby Jesus
 The Book
The Star
My husband gave me the genius idea to sew a pocket on the back of the bag in order to keep the book and puppets together.  Yeah, we make a good team.
 Cute right!?  I LOVE it!!!

SUPER GROVER!!!

So today while browsing pinterest, my oldest son saw the grover hand puppet I saved under my craft section.  He got super excited and asked if we could make "Super Grover"!  He was beside himself with excitement, so I shut the computer down and away we went to construct a super grover.  He and Parker both made one.  I did the cutting, and sewing and they placed the face on and what have you.  Mostly it was me who made them, just due to the fact that they're both too young to sew, cut evenly and use a hot glue gun, but I let them participate as much as little boys their age can.  I quickly cut the body out and let them pick out their eyeballs, and nose.  I put a dab of glue in the correct spots for them and they put the pieces of the face and logo on.  It was so cute to see them fly their super grovers around the house.  If you want to make one go here for the tutorial: http://www.makeandtakes.com/crafty-grover-hand-puppet  I just did the logo and cape of my own accord using felt for the logo and cape, and ribbon for the tie of the cape.  Nothing fancy, I just glued the ribbon along the top of the cape then tied the front and glued it in place. I would upload a pattern of them if I knew how to, but I don't.  Don't worry though, it's not hard.  If I can do it, anyone can!

I also made an Elmo.  Super simple and super cute.  That's what I'm talking about.

Wednesday, December 21, 2011

The Three Little Piggies
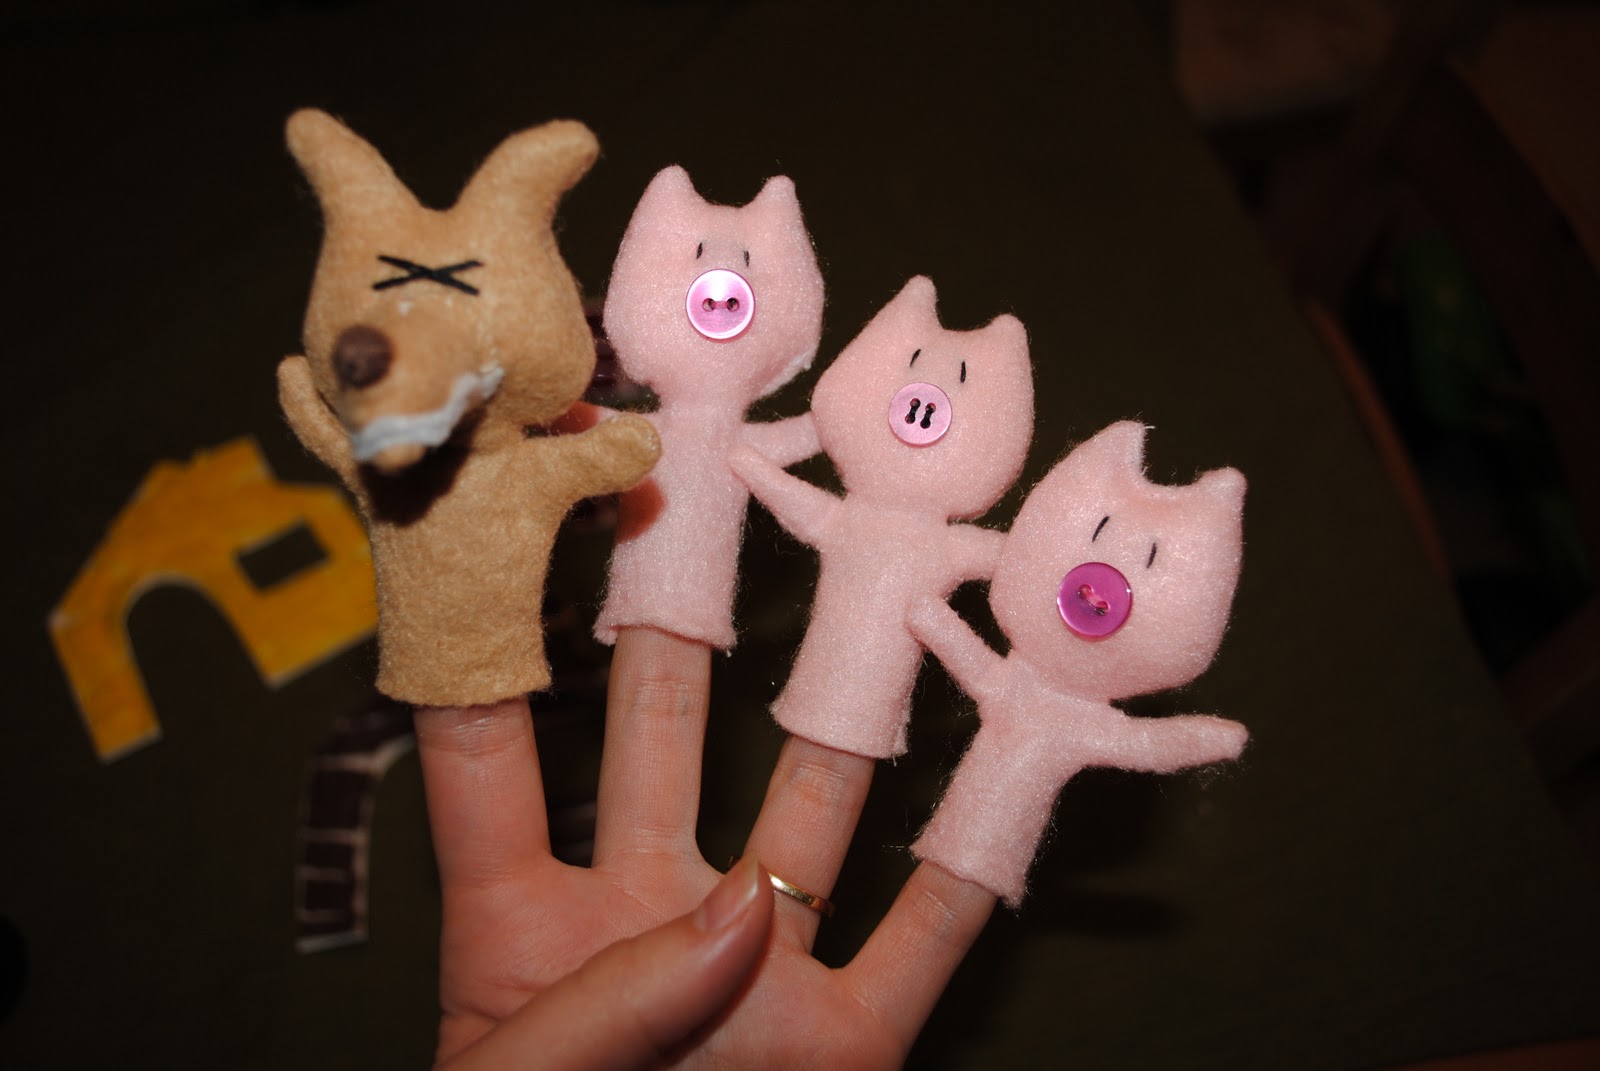
 I LOVE making these as baby shower presents.  They are perfect for that (in my opinion of course).  If you're interested in making your own set, go here for the tutorial: http://obsessivelystitching.blogspot.com/2009/09/3-little-pigs-finger-puppets-tutorial.html

As you can see, the set I've made here differs from the original set.  I wanted to make it more personalized according to my taste.  If you're interested in doing things similar to how I did them, here's what you'll need:

3 pieces of hard based paper (ie. card stock, card board from cereal box, or whatever you can find around the house)
Three 8"x11" White felt*
One 8"x11" Yellow felt
One 8"x11" Deep red felt
One 8"x11" Brown felt
Craft sticks (popsicle type sticks)/optional
Hot glue gun (only if using craft sticks)
Coordinating thread
Fabric glue (optional)

* You should be able to find normal cuts like this in stacks at places like Wal-Mart.

I apologize in advance if any of my instructions don't make sense due to the fact that I failed to take pictures of the process.  I didn't intend on posting this originally.

1.  Cut three houses out of the white felt.
2.  Cut the yellow felt into long skinny strips (for the house made of straw)
3.  Cut the red felt into little rectangles (for the house made of brick)
4.  Cut the brown felt into long, fat strips (for the wood house)
5.  Place the cut yellow felt ontop of one of the white houses.  While holding it in place, sew it onto the house or glue it in place if using fabric glue.  Don't worry about cutting pieces to fit the cut of the house such as the window, door or outline, just sew it on.
6.  Cut the excess felt off that is hanging over the house.  Cut the felt out of the window and door. (repeat steps 5-6 for each house)
7. Place the completed house on top of your hard paper and sew along the outter edge of the house, window and door.
8.  Cut house off of hard paper.  Cut window and door out.
9.  If using a craft stick, place some hot gule on it and glue it onto the back of the house, leaving enough of the handle sticking out the bottom for use as a handle. (repeat steps 7-9 for all houses) 

For my wolves eyes, all I used was black thread and a hand held needle and I sewed a big "X".  I repeated sewing the shape until it was dark enough for my liking.

Now all you need is to purchase a copy of the actual story in book form and you have a completed gift! You could also find a printable version of the story online and deck it out all cute and crafty like if that's what you're into. LOVE IT!

Thanks so much to http://obsessivelystitching.blogspot.com/ for posting such a cute project!!! Check her site out.  She is awesome!